Some Mac Tips
Some settings or tips I've learned over the years to make using your Mac an even nicer experience
In September I took to LinkedIn (my personal LinkedIn, Tosbourn Ltd. LinkedIn if you want to follow) with a series of posts, one a day, in fact, sharing different tips and tricks I’ve used with my Mac.
Here they are, as one post!
Table of contents
- Remove apps you no longer need
- Clean (or hide) the dock
- Add frequently accessed folders to your favourites
- Tagging files and folders
- Tidy up the menu bar
- Set up Spotlight
- Enable system updates
- Using smart lists in Reminders
- Clear out your downloads folder
- Review your notification settings
- Add additional keyboard layouts
- Set up your function key
- Configure your trackpad
- Configure your Finder sidebar
- Experiment with dimming the screen and backlight
- Setting a spell checker
- Some quick improvements for the default mail app
- Improve the mac with accessibility options
- Customise the Control Centre
- Use common Mac shortcuts
- Improve battery performance with some small tweaks
- Accessing iCloud on the go
- Tidy up large and unused documents
- Adding widgets to the desktop
- Position second monitors
- MacOS preview for files
- File Vault and encryption
- Sharing folders and documents
- Closed captions and subtitles
- Having more keyboard control
Remove apps you no longer need
Unused apps take up physical space, give your system one more thing to keep tabs on with automatic updates, and add to visual clutter when searching or trying to do something on your Mac.
There are very few applications which you couldn’t download again if your needs change.
In your Finder1 app find Applications on your sidebar or by selecting Go -> Applications from your menu bar.
Look through the applications and remove (right click, then Move to Bin) any you know you don’t need.
If in doubt, keep it or do a quick internet search to confirm what the app was used for.
Another way you can do this is via the System Settings2. From there General -> Storage and click the information icon beside Applications. This will show all applications by size.
Now you can sit back and enjoy the extra space and reduced clutter!
Clean (or hide) the dock
Let’s clean up (or hide?) the Dock on your Mac
The Dock is the little menu bar of applications that normally sits at the bottom of your screen on the Mac. I personally don’t like it and have it hidden by default, but even if you like it, unless you’ve tidied it up before I bet there are applications on there you’ve never wanted to interact with.
The first step to tidying it up is to right click on any application you would rather not be in your Dock and select Options and unselect Keep in Dock, now it will only show if the application is open.
The next step is to go into your System Settings2 and go to Desktop & Dock.
From here there are a range of options for the Dock, have a good look through, I’d especially recommend adjusting the size and magnification.
I personally have “Automatically hide and show the Dock” turned on, so I only see the Dock when I move my cursor to the bottom of my screen.
And now you have a nicer Dock, and potentially more screen to play with!
Add frequently accessed folders to your favourites
Here is a quick way to keep your frequently accessed folders handy on your Mac
There are some folders I use way more than others, but unless you’re a long-time Mac user (and maybe even then) it isn’t obvious how you favourite or showcase a particular folder.
In Finder1 go to the folder containing the folder you want to care about, grab the folder and drag it into the favourites area of the Finder window, making sure you aren’t placing the folder into one of the folders in your favourites.
If there is a favourite you no longer want in the sidebar, right click on it and select “Remove from Sidebar”
Tagging files and folders
Have you ever been searching for a file you know is related to a specific project, only the file wasn’t where it was supposed to be? I do this all the time and curse past me for not taking two seconds to tag the file properly.
When you tag a file or folder you essentially give it some meta information to make it easy for the Mac to show you all files linked to that tag.
To tag something on the Mac, right click on it and click “Tags”, from here either select one that already exists or create a new one.
To view everything under a tag, in your Finder1 you might have an area already for tags, if you don’t go to your menu bar and select Finder -> Settings and under Sidebar make sure to select Tags. Whilst in settings you can also show or hide specific tags, which is useful for hiding things that aren’t your current focus.
With your Finder set up, clicking on a tag from the sidebar will show all related files, wherever they exist on your system.
Tidy up the menu bar
The menu bar is the fixed bar at the top of your screen which on the left has all your application menus and on the right has shortcuts to various apps.
If left unchecked, this can get pretty unwieldy, and if there are things in there you don’t use, there is no point in them adding to visual clutter, indeed some of them are running in the background and might be slowing your Mac down some.
These icons can be grouped largely into two, applications you’ve installed, and system icons. How you remove them will depend on which group they are in.
For applications you’ve installed yourself, you normally click on the icon and select Preferences (or Settings) and often they will have a “show on Menu bar” or similar. You can untick this.
For system items you can go to your System Settings2, then go to Control Centre. From here you can control what can show in the menu bar. Update these settings to suit.
Hopefully this will lead to a more clear and more useful menu bar for your Mac. If you followed my advice for the Dock I shared above, you’ll have a much more clear screen!
Set up Spotlight
Spotlight is the search widget that appears when you press cmd + space. You can use it to quickly open applications, documents, and system settings.
If you don’t use it already, consider that a bonus tip, give it a go!
Assuming you do use it, you can refine what it tries to bring back by enabling or disabling certain categories of things to help streamline the process.
By going to System Preferences2 and going to “Siri & Spotlight” you will get to a screen which lists all the Spotlight search results.
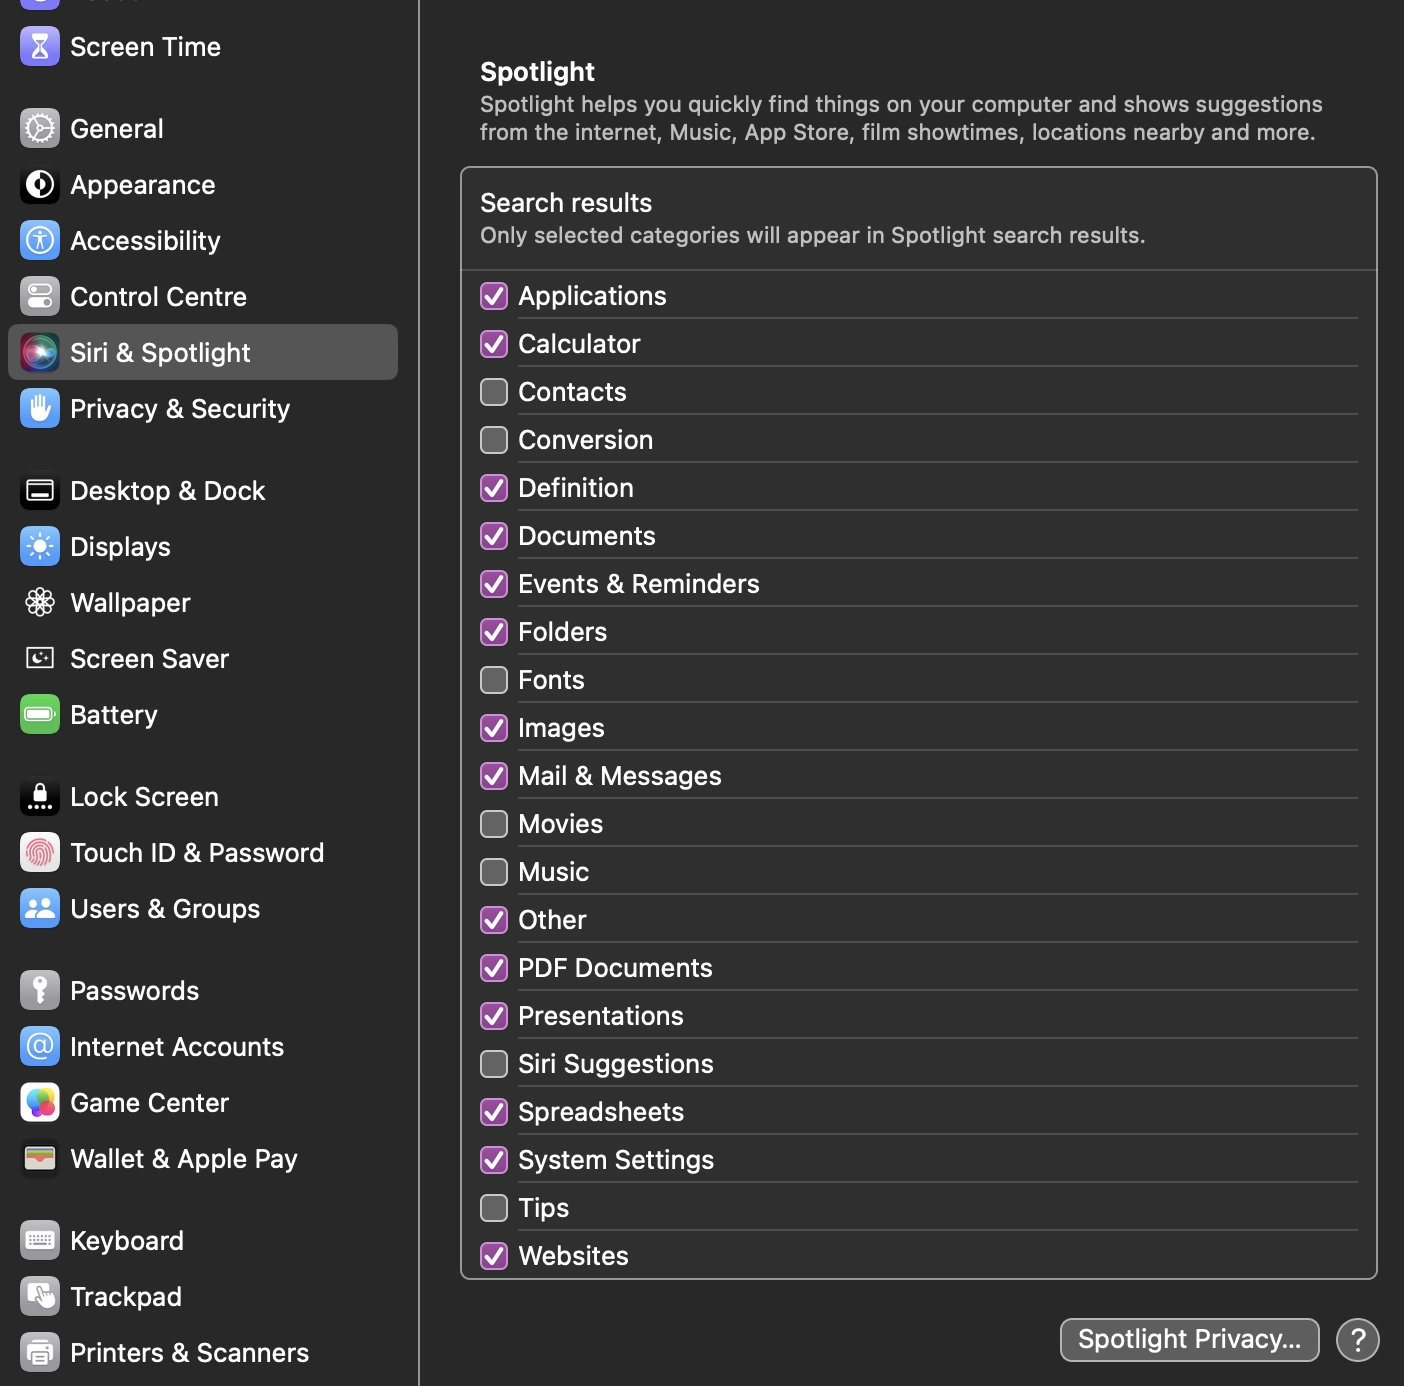
I’ve disabled “Contacts” because that is never how I use my Mac, but that might be really important to you.
By tweaking these you’ll find more useful (for you) results from your Spotlight!
Enable system updates
I’m going to phrase this like it is a helpful hint, but please just do this.
In System Settings2 you can go General -> Software Update.
Unless you have a really good reason, you’ll want to click on the “I” icon next to Automatic Updates and select almost everything;
- Check for updates
- Download new updates when available
- Install application updates from the app store
- Install security responses and system files
The only thing I don’t select is Install macOS updates. I like to be in control of when I actually hit the button on a larger update. Having “Check for updates” on will mean you get alerted to a new update being available.
In the same settings panel you’ll see a Beta updates. I would recommend always keeping this to off. There is nothing wrong with running Beta software (this is software still being worked on and potentially with rough edges) but you should be in control as to when and if you download Beta software.
Using smart lists in Reminders
The Reminders app on Mac is surprisingly powerful, I want to share a tip on how you can have lists of reminders which automatically show you what you need to be most productive.
Never ask me about to do lists, because there is a chance I won’t stop talking. I have lots of thoughts! One of them is that a list which shows you something you couldn’t possibly work on right now probably isn’t the best.
To help with this, one of the things I like to do with the Reminders app is create smart lists instead of standard lists. A smart list is one that automatically shows you reminders based on some set criteria.
You can create a smart list to show all tasks due to be done in the evening when you’re at home. Or all tasks due in the next 3 days which have a tag of “work”.
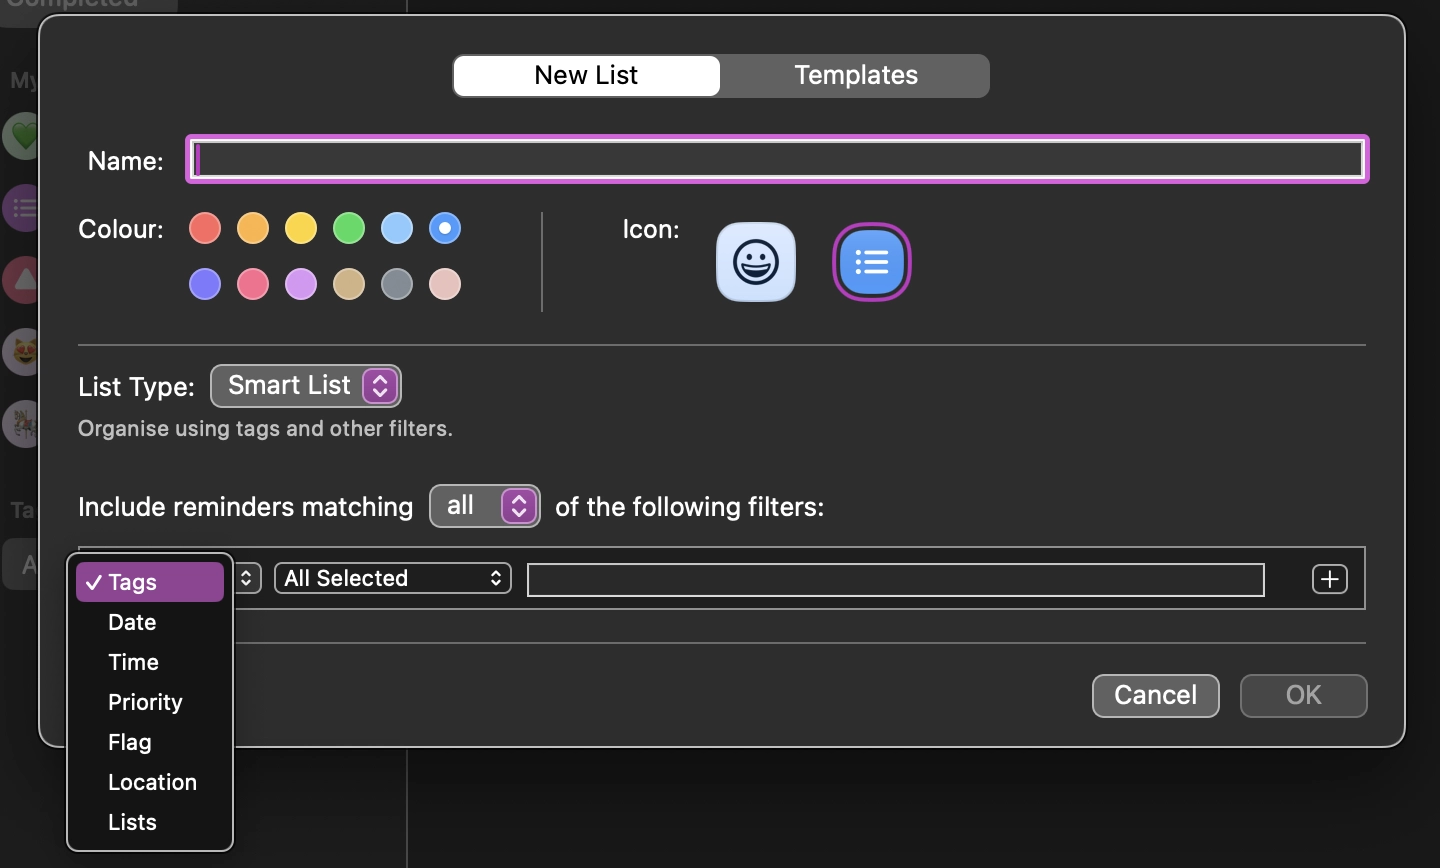
In the Reminders app click Add List in the bottom left, or click File -> New List from your menu bar.
Give it a name and a logo, then for List Type, pick Smart List
Then you can start making your filter.
Once complete, you can add things manually to this list, and it will mark up the reminder with everything you’ve set, or you can add a reminder to any other list and if it meets the criteria it will show up here.
Now instead of having an overwhelming amount of reminders, you can look at a subset that only contains the ones currently relevant to you!
Clear out your downloads folder
This is a call to action: Clear out your downloads folder!
If you’re anything like me you’ll routinely have a massive Downloads folder from things you’ve pulled from the internet.
This is your excuse to spend 5 minutes making a dent in sorting it out.
This could mean;
- deleting things that you don’t need anymore (and probably didn’t at the time)
- moving things to a more appropriate home
- tagging items so you can easily search them later
The downloads folder is rarely backed up by default, so if there are files you need in here, either make sure your downloads folder is backed up, or move them somewhere that is backed up!
Review your notification settings
Find yourself ignoring lots of notifications on the Mac? Time for a spring clean!
If left unchecked, the amount of things that can create notifications on your Mac can grow and grow, and if you’re anything like me you will quickly get notification fatigue and not actually act on anything.
I find it useful to go into the Notifications settings and make sure only things I care about can generate notifications.
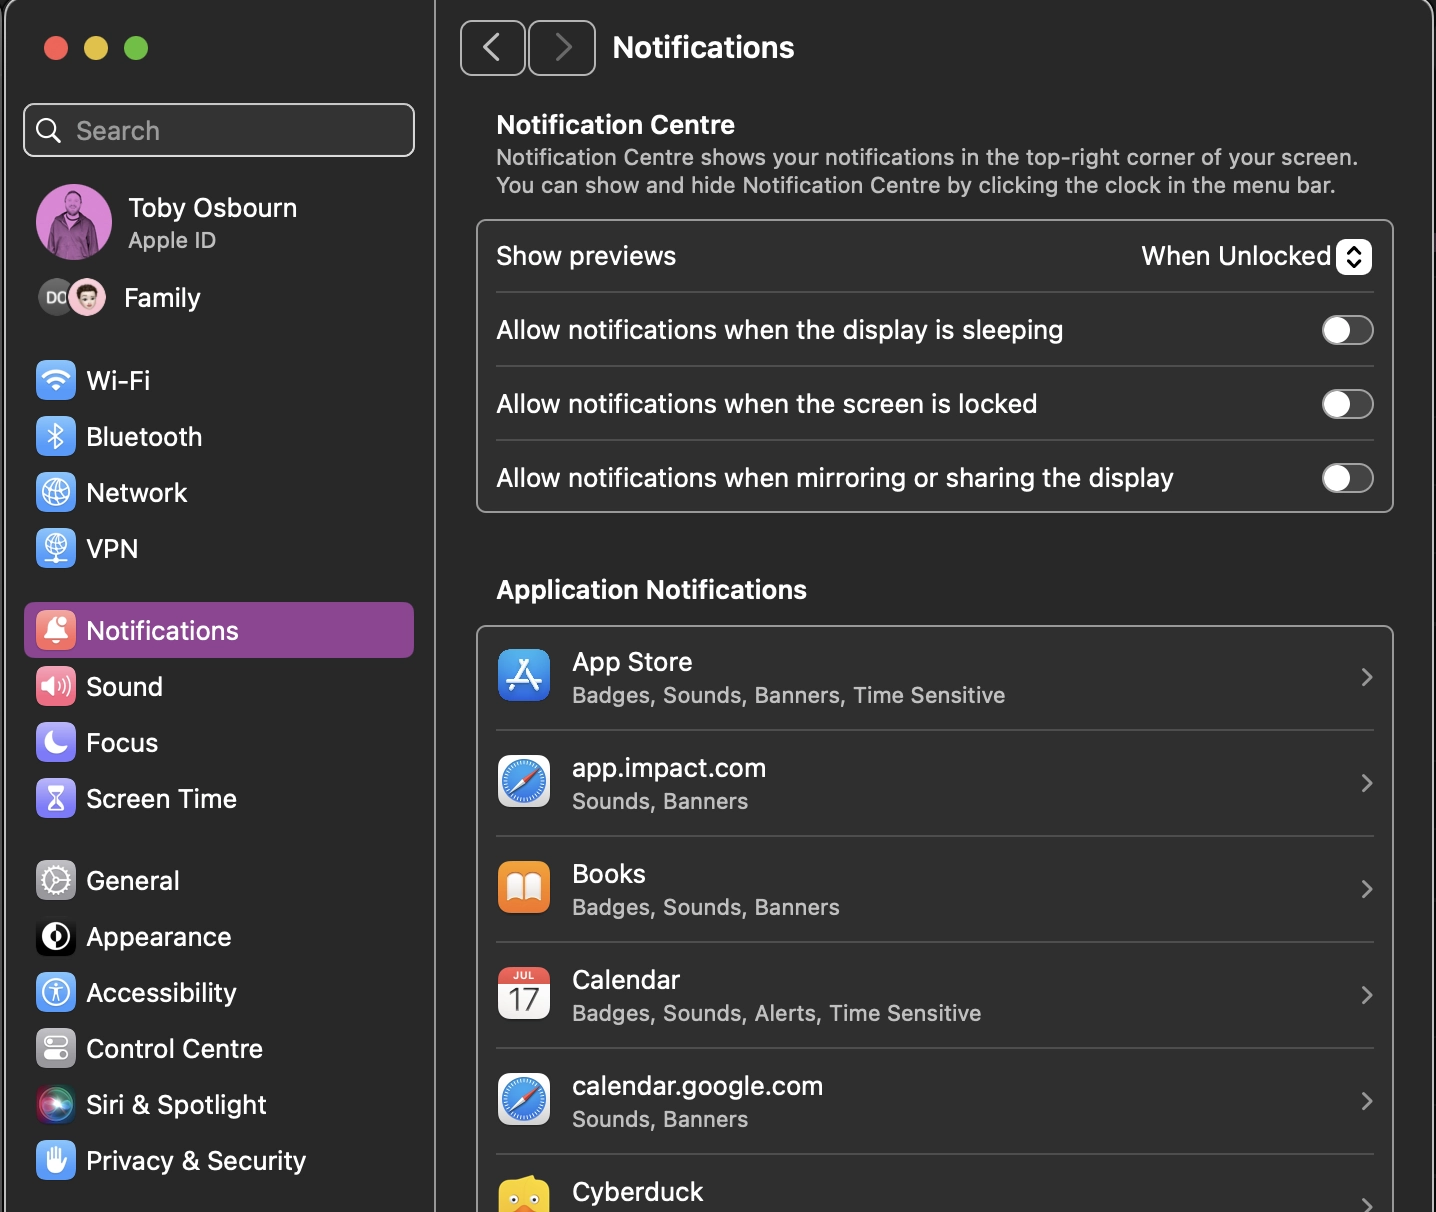
From your System Settings2 click Notifications.
First things first, make sure that the Notification Centre only notifies of you things when you want, I suggest only showing previews when the Mac is unlocked, and not allowing notifications when your display is locked or sleeping.
One very useful option is to disable notifications when you are mirroring or sharing the screen, so no random interruptions when you’re presenting something!
After changing global settings, you can change things for specific applications.
My personal recommendation is to only have notifications on for things that you would be happy dropping everything to look at. Almost everything else can wait until you’re actually in the application.
Add additional keyboard layouts
Do you often jump between writing in different languages? You can set your Mac up to make the most out of different language settings.
Certain language settings give more prominence to different parts of the language, and you might find it more natural to use a language setting made for the language you’re writing in.
To add a new language, go to System Settings2, go to the keyboard section and click Edit next to Input Sources.
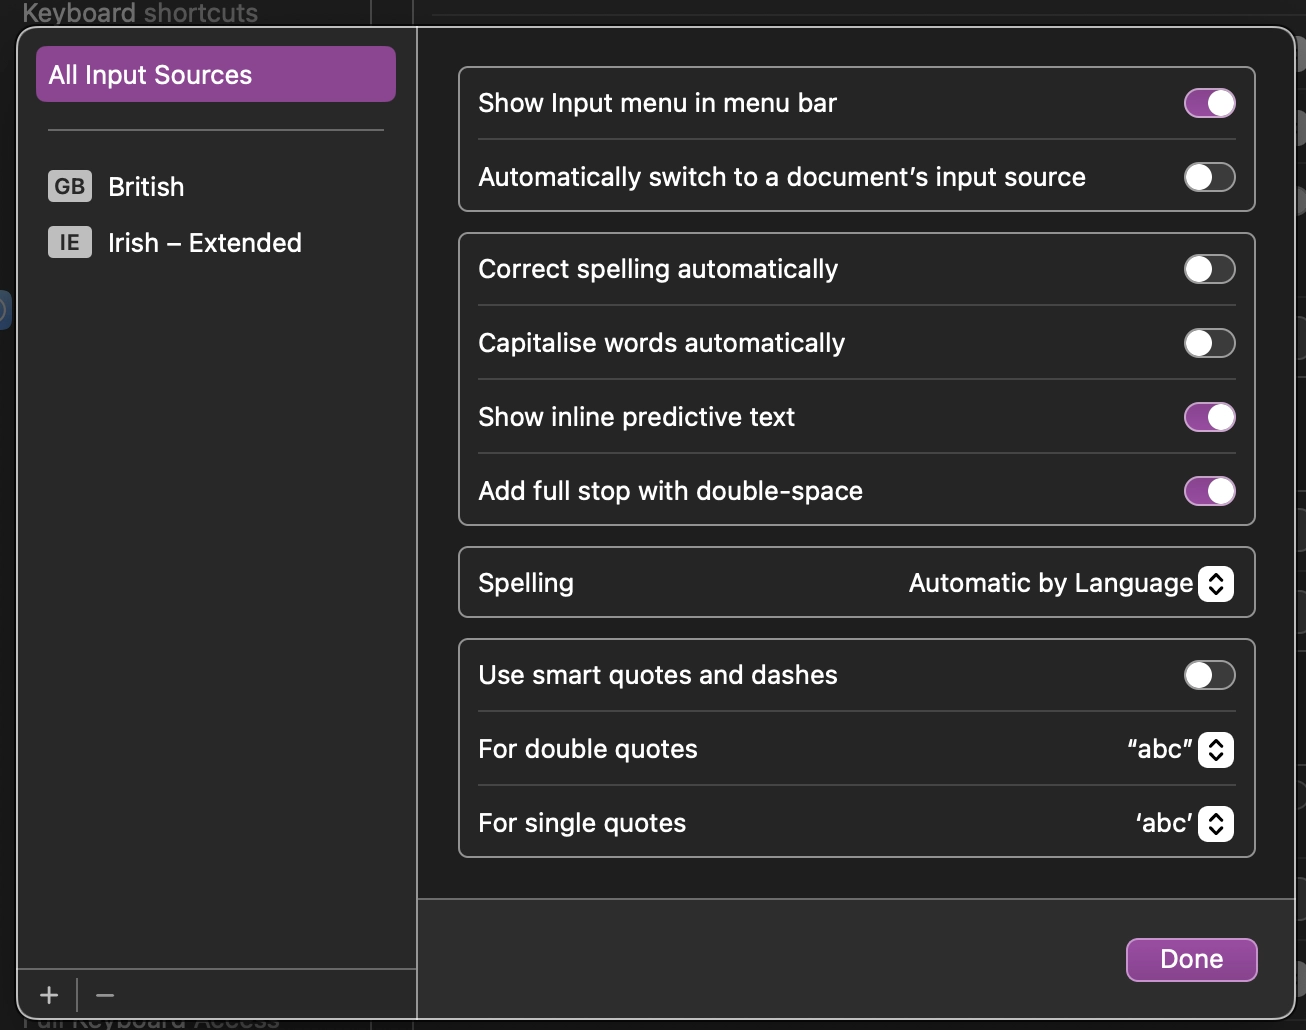
From here you can click the plus (+) button and select a new language.
Here is a video I made a while back explaining how I added the Irish keyboard setting to make it easier for me to write characters like áéíóú.
Set up your function key
If you’re anything like me, the function (fn) key on your Mac keyboard isn’t pressed too often.
Unfortunately without additional programs, we only have a few options for what we can do with this key, something I like to do is have it show the emoji keyboard when pressed. Which I do like to use and the default keyboard shortcut for it is a bit awkward.
To make this change, go to your System Settings2 and go to Keyboard. In this window you’ll see a “Press (fn) key to” (well actually you’ll see a little picture of a world but I couldn’t find that anywhere I could copy and paste!). From here you can select;
- change input source (handy if you followed my tip above)
- show emoji and symbols (what I use)
- start dictation (press twice)
- do nothing
This is a small quality of life improvement, but they add up!
Configure your trackpad
I’m not a big fan of the default settings on the trackpad, and there are some things you can do to make your Mac more of your own.
I will walk through the trackpad settings, but the mouse is similar.
Visit System Settings2 and go to Trackpad.
We have three tabs to look through, the first is the most interesting in my opinion. Here you can adjust how sensitive the click and movement is on the trackpad. I prefer a light click and a fast tracking speed, experiment and see what feels more comfortable for you.
I always turn off “tap to click” because I found I was accidentally clicking things I didn’t want to when it was on.
Under the other tabs you can configure things like how you zoom or scroll, and getting quick access to some other Mac functionality.
I won’t make suggestions on what you should enable or disable here, but I would say if you’ve ever been frustrated by accidentally doing a thing on the trackpad, you can probably turn it off here.
Playing about should take 2 minutes, and it can greatly increase how nice the trackpad is to use.
Configure your Finder sidebar
Did you know you can configure the sidebar in your Mac Finder?
In one of my first tips I shared how you can add frequently used folders into your favourites but there is more we can do here.
To start, open up your Finder1 app, and go to settings, which will be found by clicking Finder and Settings in your menu.
Click on the Sidebar section of the settings and you’ll see a long list of things you can turn on and off.
I’d advise turned off anything you don’t use frequently because it removes visual clutter and makes the things you do access frequently easier to scan and access.
Experiment with dimming the screen
A brighter screen can be bad for your eyes, and will use more battery than a slightly more dim screen.
Now, if you need a brighter screen to see comfortably, then I’m not suggesting you do anything to make things harder on yourself, but I do think many folk could turn it down a notch or two without anything negative happening.
To test this out, press F1 a couple of times, which should dim the screen. Don’t go on first impressions, use it for 15 minutes and get adjusted.
Note, you might have automatic brightness adjustment turned on in your settings, which allows the Mac to change brightness for you. I personally have this turned off as I like to be in control of these things. You can turn it on or off in System Settings2 -> Displays
Setting a spell checker
Here is a Mac tip I only learned thanks to a question I received on LinkedIn when doing this series.
Mac Mail and Pages were defaulting to US English all the time for spell checking, even when the primary language of the Mac was UK English.
It turns out there is a separation between system language and spell check language. To update which language is used for spelling and grammar. Open up System Settings2. Go to Keyboard then Text Input/Input Sources and hit Edit. If “Spelling” is anything other than “British English” change to British English (or your desired language).
Some quick improvements for the default mail app
Here are some settings I use to make the Mail app more useful for me.
All these are found in Settings (Click Mail -> Settings in your menu bar).
- I turn Link Previews off, these are the little social cards that appear when you paste a link. Found in the Composing section
- I changed the check for new messages until Every 15 minutes. I don’t need to see emails come in immediately. Found in the General section
- I turn off notifications and sounds, please please please do the same! (again, General section)
- Unsure what the default is, but you can change how many lines you see in a preview, I like 4 lines of context. Found in the Viewing section
These are subjective, but do take 5 minutes to look around the settings and see if there is something you prefer!
Improve the Mac with accessibility options
Accessibility options on the Mac are for everyone and can make your experience using your computer way more pleasant.
Like some of my other tips, the specifics here will depend on what you really want out of your Mac, and the more general tip is to spend some time looking at these options because you could find something you really like!
To access the accessibility settings, go to System Settings2 and go to Accessibility.
Within here are lots of options, under the Display section I like to enable Reduce motion (because I don’t like too many things moving at once), and Increase contrast, because I find it easier on my eyes.
You can also do things like increase the pointer size and colour.
It is easy to assume that these options are for people that “need” them, but for example you don’t need to have issues with your hearing to potentially benefit from having your screen flash when there is a notification if you happen to work in a loud environment.
Customise the Control Centre
The control centre can be a surprisingly handy tool to change things up on your Mac, but the defaults might not be the most useful, let’s fix that!
First of all, if you don’t know, the control centre is the little icon that look like two switches on your menu bar, clicking it shows options like turning bluetooth on or off, or accessing things like volume control.
You can turn off lots of the items that appear here, and add some ones you may not realise you could get quick access to.
In System Settings2 go to Control Centre.
From here go through each setting (there isn’t that many) and decide if this is something you’d like to see.
Even if you don’t use the control centre, this is the same place you will go to remove things from your menu bar so it’s a good excuse to do some tidy up!
Use common Mac shortcuts
Today’s Mac tip is a collection of keyboard shortcuts that I use often on the Mac. Keyboard shortcuts aren’t for everyone, but I find learning a few can go a long way to making you more productive and reducing the amount of clicking or keypresses you have to do.
cmd + space– Open the Spotlight findercmd + ,– Open the settings for the app you are incmd + tab– Cycle through all open appscmd + shift + tab– Cycle through all open apps in reverse- When cycling through apps press
Qto quit the app ctrl + cmd + space– Emoji pickercmd + shift + 4– screen shot (use the mouse to drag over what you want to screenshot)cmd + shift + 3– Full screen screenshot- In any browser
cmd + L– Go to the location bar to quickly type a URL or search term
Improve battery performance with some small tweaks
Here are some small tweaks that could improve the battery performance of your Mac.
These are small changes, but anecdotally I’ve found them to make a pretty big difference to how much you can get between charges.
First off is a biggie, in System Settings2, visit the Battery area and make sure that Low Power Mode is enabled when on Battery.
From the same area, click “Options” and make sure that “Slightly dim the display on battery”, and “Optimise video streaming while on battery” are checked.
Next up go to the Keyboard part of Settings and turn your Keyboard brightness down (I have mine off). Even if you like having it on, consider setting the backlight to go off after 5 seconds of inactivity.
Finally, go to Displays and play with the brightness there, I’d suggest turning it down a few clicks and not having “Automatically adjust brightness” turned on. Give your eyes 5 minutes to get used to the new setting and see how you go.
Accessing iCloud on the go
Did you know you can access and even edit your iCloud documents from a web browser from any computer?
Visit icloud.com, sign in, and away you go!
As well as files, you can see, edit, and create Notes or Reminders.
This is a life saver when you’re maybe away from your phone and computer but need to access a file or note!
Tidy up large and unused documents
Here is an efficient way to find old files you could delete from your Mac without needing to download an extra application.
Go to System Settings2 then in General click on Storage.
This screen has a lot of things that you may want to look at and delete. I got a lot of value clicking the information icon beside Documents.
This shows some of the largest files and the last time they were accessed. Which makes it a breeze to consider what could be deleted.
Enjoy your free space!
Adding widgets to the desktop
I’ve got a lot of value out of adding a couple of widgets to my desktop on MacOS. Depending on how you use your Mac, you might too!
Right click on your desktop and select Edit Widgets. From here you can search for and add widgets to your desktop.
I personally have my Reminders and Calendar showing.
It took me a short while to get used to them, but once I did I found myself interacting with the main applications less and the widgets more.
If you aren’t seeing Widgets and are on Sonoma, go to System Settings -> Desktop -> Enable "Show Widgets"
Position second monitors
This tip will be obvious to some, but life changing to others.
You don’t have to accept the position that Apple picks for you for your second, or third, monitors.
If you find your cursor doesn’t quite line up when moving between monitors, you can tweak by going to System Settings2 and Displays.
From here click the “Arrange…” button and you will be able to drag around your monitor setup, this is probably best described as a video, which I’ve attached!
MacOS preview for files
MacOS has always had a pretty good file preview built into it. Accessing the preview isn’t super intuitive unless you’ve been using Macs for a while.
If you want to quickly preview a file from your Finder1, select the file and press the space bar, a window will pop up with the file contents.
If it is a multi-page PDF, you’re even able to scroll the pages. Really handy if you just need to read or check a quick thing and don’t need to open an app to do it.
File Vault and encryption
This is a quick setting I think everyone should have on their Mac, enabling File Vault.
One way to protect the data on your computer is to encrypt it. This sounds scary but all it means is if someone took the hard drive out of your computer and tried to get access to your files, they would need to enter the same password that you type every day when you log in.
On the Mac they call this File Vault. And you enable it from System Settings -> Privacy & Security -> File Vault.
You will need to make sure you don’t forget your password, or have the recovery key Apple will share with you somewhere safe. But honestly I’d rather I somehow managed to loose my data in the case of my laptop getting broken or stolen, than risk that same data being used by someone else.
Sharing folders and documents
Want to share a file or a folder with someone else who has a Mac? You don’t need to zip or email it, you can share right from your Mac.
Right click on the file or folder you want to share, click “Share” and pick if you want to send a copy, or allow the people you’re sharing with to edit or add to what you’re sharing.
Then you can either invite specific people, or share the link however you like.
Any file or folder that is shared will allow you to edit access by right clicking and going to “Manage Shared Folder”
This can be much cheaper and easier than using file sharing systems like Dropbox, assuming everyone is using a Mac.
Closed captions and subtitles
If you’re anything like me, even if you aren’t hard of hearing, you appreciate subtitles. The Mac lets you customise how subtitles look when playing video files that support it.
I like to bump down the size a bit, because whilst I like having them there, I don’t rely on them, but you might like to make them larger, or increase the contrast.
To access this, go to System Settings2 and Accessibility. From here click Captions and select from some pre-made styles or make your own by clicking the + icon. A custom made one can even prevent the video from overriding with its own styles if you like!
Having more keyboard control
My final tip in this article is about setting up your Mac for more keyboard control. The theory being that learning how to use the keyboard to control things on your Mac is more efficient than moving a cursor around the place.
This is a personal preference, and depends on how easy you find it to navigate a keyboard, but for those who want to give it a try, you need to enable some settings first.
In System Settings2 go to Keyboard, and from there enable “Keyboard Navigation”. This lets you use the tab key to move between Mac settings windows and buttons. To toggle or press a button, use the space bar.
Between this and some keyboard shortcuts like cmd + tab to move between applications, you can do more without needing to leave the keyboard.
Some extra definitions
-
The Finder is the smiley blue face icon, you use it to manage folders and files. It is the Mac’s file explorer. You can normally access the Finder from your Dock or by using Spotlight. ↩ ↩2 ↩3 ↩4 ↩5
-
System Settings are where you can change system-wide preferences on your Mac. Open System Settings by clicking on the Apple logo on your menu bar and selecting System Settings ↩ ↩2 ↩3 ↩4 ↩5 ↩6 ↩7 ↩8 ↩9 ↩10 ↩11 ↩12 ↩13 ↩14 ↩15 ↩16 ↩17 ↩18