Between writing code and doing tech-lead type things, I run a few Instagram accounts. I’ve been trying to get better at the Instagram meta, and have been reading up on what smart marketers are doing. I kept hearing about picking appropriate hashtags based on your account’s velocity.
My understanding is if your account gets <100 interactions per post, you won’t do well on a hashtag that features posts gaining >1000 interactions. Instead of adding a load of hashtags that cover generic keywords, you should niche it down to less competitive hashtags that you could do well in. I learned most of this from watching videos by Ben Leavitt, you should check out his YouTube channel.
This is like in SEO, where it is usually much easier to rank for a long-tail term than it is to rank for a very generic term.
To know what hashtags you stand a shot at, you need to work out how many interactions they are getting on average. You can do this by visiting the top posts for a given hashtag, adding up the comments and likes, and dividing by the number of posts you looked at.
Calculating like this takes a long time, and since the amounts will continuously change, you only ever have a rough estimate.
I wrote a script that you can run either as a bookmarklet or from your browser console. For a given hashtag this script will provide you with the average velocity.
  let topPosts = document
    .querySelector("article div")
    .getElementsByTagName("a");
  const mouseoverEvent = new MouseEvent("mouseover", { bubbles: true });
  let count = 0;
  for (let topPost of topPosts) {
    topPost.dispatchEvent(mouseoverEvent);
    var spans = topPost.querySelectorAll("li span");

    for (let span of spans) {
      var tempVal = parseInt(span.textContent.replace(/,/g, ""), 10);
      if (tempVal > 0) {
        count += tempVal;
      }
    }
  }
  alert(count / 9);
I will explain the code shortly, for now, let me explain how to get it working.
- Visit the URL of the hashtag you care about, it will be
https://www.instagram.com/explore/tags/YOUR_HASHTAG/ - Open up a browser console (right-click and inspect element should do the trick, then click on the console tab)
- Paste the above code into the console and press enter
If everything has worked, a pop-up box should appear with a number. This is the average amount of engagement the top posts are getting.
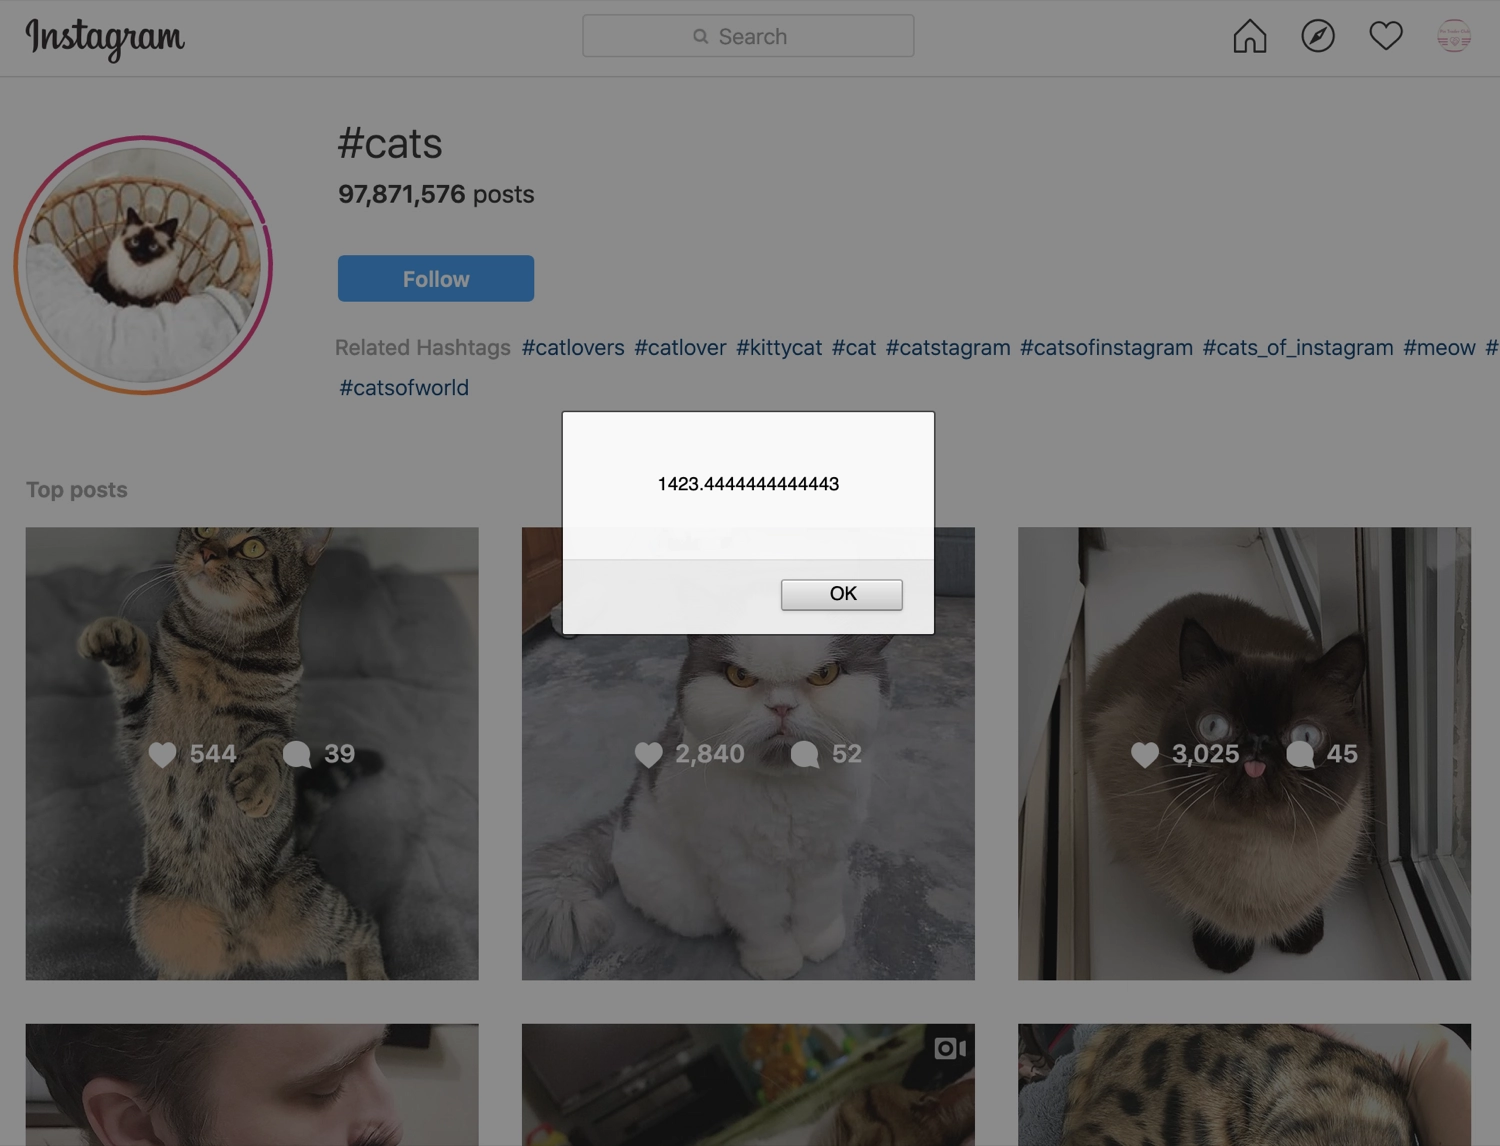
The theory is if you think you could get a similar amount of engagement, use the hashtag. If you’re well under or over it, then this isn’t a relevant hashtag for your account now.
Opening up the console each time is a pain. To make the script into a bookmarklet which you can run with the click of a button you need to;
- Copy the code below
- Create a new Bookmark in your web browser
- For the location (which is usually the URL), paste the code
To use this bookmarklet, be on the URL for the hashtag you care about and click the bookmarklet. The pop-up box will appear with the number you care about.
javascript: (function() {
  let topPosts = document
    .querySelector("article div")
    .getElementsByTagName("a");
  const mouseoverEvent = new MouseEvent("mouseover", { bubbles: true });
  let count = 0;
  for (let topPost of topPosts) {
    topPost.dispatchEvent(mouseoverEvent);
    var spans = topPost.querySelectorAll("li span");

    for (let span of spans) {
      var tempVal = parseInt(span.textContent.replace(/,/g, ""), 10);
      if (tempVal > 0) {
        count += tempVal;
      }
    }
  }
  alert(count / 9);
})();
I imagine most people reading this post will be doing so because they want to work out the number. If you are one of those people, you can stop reading here.
The JavaScript behind the code
If you are here to look at some JavaScript, then let’s talk about some JavaScript!
let topPosts = uses a mixture of querySelector and getElementsByTagName to grab all the a elements that are in the top posts section.
querySelector will return the first div inside an article, this is the top posts section, and the only a elements inside that section are the posts.
const mouseoverEvent = new MouseEvent("mouseover", { bubbles: true }); is a neat way to create an event that you can invoke on an element. We need to emulate mousing over each post for React to generate the HTML we need.
let count = 0; creates a new variable count which we will be adding various counts to later.
With these three variables initiated; topPosts, mouseoverEvent, and count we can get into the main part of our script.
We loop over all the topPosts and for each topPost we do two things; we invoke our mouseoverEvent which will trigger a change on the webpage. We then grab the new content, which is some span elements that contain the comment and like counts.
Next, we need to loop over these spans. There will be two, one for comments and one for likes. There can also be blank spans returned, which is important for our next bit.
For each span we want to grab its textContent, replace the comma that appears as a thousand separator, and convert it into an integer. We do this with var tempVal = parseInt(span.textContent.replace(/,/g, ""), 10);.
I’ve assigned it to tempVal because I need to use this figure twice. Once to check to see if it is greater than 0, this is a quick way of ignoring NaN results brought back by empty spans.
Assuming it is greater than 0, we add it to our count variable.
After everything has ran, we have a count variable with all the comment and like counts for the top 9 posts. Now we need to show the user the average. We can do this with alert(count / 9).
Improvements to the JavaScript
This was something made quickly to scratch a personal itch, it isn’t what you would call “production ready”.
There is room for improvement, to show how a refactor might look, these are the things I’d consider:
- That hardcoded 9 at the end seems suspect, if Instagram decided to show 12, this script would silently bug out but still return a number. We know how many
topPoststhere are, so let’s use those. topPostsis never changed, it could be aconst, not alet.- Anytime you immediately need to have an if inside a loop to discount some of the loop it is worth considering improvements to the code that generates the input to the loop. In this example we’re having to handle the case our span has no content, should we only find spans with content?