We have built up a reputation for creating Ruby on Rails projects that do well on search engines. This article is our attempt at sharing everything we know about setting up Rails for SEO success.
To get the most out of this article, you should have a basic understanding of how to do things in a Ruby on Rails project, for example, installing a gem or changing a view file.
We will be updating this article regularly as either our thinking changes or the best tools to use change.
Table of Contents
If you want to skim the main points and follow the guidance quickly, then use these links. Very few sections require you to have done any of the others, so feel free to pick up the low-hanging fruit for your particular project.
Table of contents
Why care about SEO?
The chances are you clicked into this article because you care about SEO and want to know how to do it well in a Rails application. In case you still need convincing, I want to clarify what we mean by Search Engine Optimisation (SEO).
In general, SEO is concerned with getting your website to rank higher in search engines. If you have a page on the first result in Google for a popular enough term, you could be getting tens of thousands of visits a day; dropping only a handful of places could mean you’re getting next to none.
Think about the last time you searched for something; how many pages did you click through before you gave up? I bet it wasn’t that many!
When developers talk about SEO, what they generally mean is technical SEO. Technical SEO is a bit removed from link building, content creation, and other stuff that marketers who talk about SEO do.
Technical SEO concerns itself with making the content of your webpage as understandable to search engines as possible.
In this article, we won’t get into any technical SEO theory, but as a general rule, you want your website to be:
- Understandable by computers
- Fast
- Easy to navigate
If your website is understandable by computers, it is understandable by people who use assistive technologies.
If your website is fast, it uses fewer resources for both your server and your user’s device.
If your website is easy to navigate, your user will find what they want faster, increasing their enjoyment.
These are all widely positive improvements, and if the result is your website appears higher on a search engine, it is a win-win!
Why write about Rails?
Having your website be fast, enjoyable to use, and understandable by machines are in no way unique desires of Ruby on Rails developers. We’ve decided to write a specific article about SEO and Rails for a few reasons;
- In other ecosystems, such as WordPress, there are more established plugins that help with some of this stuff
- Lots of guidance about technical SEO is by design generic, which can leave developers more confused about a way forward
- We are Rails developers! It is what we do day in, day out!
By writing this guide, we aren’t suggesting that Rails is inherently SEO unfriendly. Like anything, Rails is a tool to do a job. While there isn’t an ActiveSEO gem baked into Rails, it does an excellent job of allowing you to iterate quickly through changes. Meaning you can apply what we talk about here in a relatively short space of time.
Have one version of your URL
Did you know that the following URLs are all considered different by search engines?
- https://www.website.com/this/
- http://www.website.com/this/
- https://website.com/this/
- https://website.com/this
Technically, these could be different pages. In reality, the vast majority of the time, you will want each of these pages to serve up the same content.
If you don’t make a conscious effort to redirect people to the correct location, then people could be sending some traffic to http://www, some people https:// and search engines won’t know the best site to use.
As a general rule, you want search engines to have to think about your site as little as possible. They only spend a certain amount of time thinking about each site, and if you waste time making it decide if you’re www. or non-www. it will be spending less time thinking about something important like “what is this web page about”.
There are three things we need to get right to ensure there is one version of a URL.
- Force https
- Force either using www or non-www versions
- Remove trailing slashes
Force https
When a web browser is sending data to or receiving data from a web server if it is over http, other people can see what is happening; if it is over https, they cannot.
This is a slight simplification, but https is more secure than http and even if your website contains 100% public information and doesn’t collect anything at all, using https shows you care and is treated as a ranking factor by search engines.
There are two steps to forcing https, making sure you can serve traffic over https and then telling Rails to redirect people to https when they use http.
Make sure you can use https
Most hosting platforms will allow you to set up the required certificates for free, and you might already allow https traffic. The easiest way to test is to visit your website with https and see what happens. Browsers will be quick to warn you if there is something not set up correctly with https.
We can’t cover setting up https for every single hosting provider, but if you use Heroku then in your App’s settings page, there is a section for SSL certificates. Ensure when you click “Configure SSL” that Automatic Certificate Management is enabled.
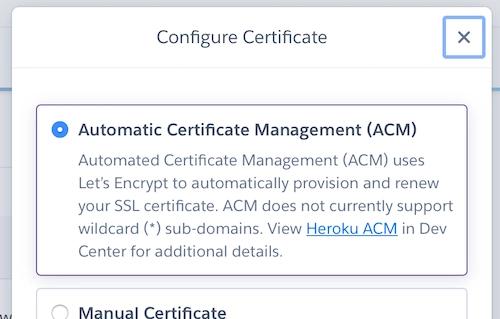
Once you can see that visiting your site with https works, you’re ready to tell Rails only ever to accept https.
Tell Rails to force https
Rails has a configuration setting specifically for forcing SSL, which for browsers means forcing the use of https instead of https.
In config/environments/production.rb, add the following lines:
config.force_ssl = true
config.ssl_options = { hsts: { preload: true } }
We add this in the configuration specifically for production instead of a more general place like config/application.rb because running your application in development mode under https can be a pain.
The second line is optional. If set will tell browsers, “Hey, I’m only supposed to use https” which in supported browsers can act as a positive signal as it improves security. If you intend to support https in the long term, setting this option will improve performance slightly. Making things fast is one of our goals.
Force using www
Search engines appear to have less of an opinion on using www or non-www domains, but you should pick one and be consistent. We tend to force www.
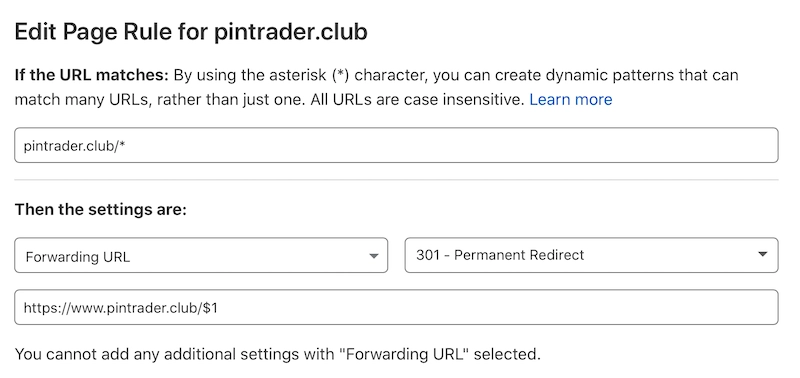
Force www at the DNS level
We like to do this at the DNS level. We use CloudFlare and tell it to redirect any non-www traffic to www with a page rule.
Force www within Rails
To handle this in Rails, we can use constraints to check if the domain has no www. If it doesn’t, redirect to www.
class Constraints::NoWWWDomain
  def self.matches?(request)
    request.subdomain == ""
  end
end
Inside config/routes.rb, we can check for this constraint and redirect as appropriate.
constraints(Constraints::NoWWWDomain) do
  get ':any', to: redirect(subdomain: 'www', path: '/%{any}'), any: /.*/
end
Remove trailing slashes
The final step to normalising all of your URLs into one canonical version is to remove trailing slashes.
We can accomplish this by using a gem called rack-rewrite. This gem introduces some middleware (code that runs at a different part of the stack to your application code) that we can use to rewrite URLs.
In your Gemfile add the following;
gem 'rack-rewrite' # we use to remove trailing slashes
The comment isn’t a requirement, but we think it is a great practice to comment why you use a particular gem.
With the gem installed, we can make use of this middleware by adding the following to the configuration block inside config/application.rb
config.middleware.insert_before(Rack::Runtime, Rack::Rewrite) do
  r301 %r{^/(.*)/$}, '/$1'
end
The first line of this code says, “before you call Rack::Runtime, please call Rack:Rewrite with the following code”.
The r301 is saying “do a permanent redirect”, we have an article all about HTTP status codes relevant to SEO.
The next part of the code is some regex that looks for anything with a slash at the end; if it finds something, replaces it with everything minus the slash.
You can test this by visiting your site and including / at the end and seeing if it removes the slash.
Reduce the need for redirects
If you’ve followed our advice for having one version of a URL, then it doesn’t matter how someone chooses to visit your site; they will get redirected to the correct version.
Redirects take effort, and we would rather not do them. Now is the time to review your code to see if your application generates internal links that would necessitate a redirect.
It is also good to let your company know about the preferred version so others can write things like tweets and other external links to avoid needing a redirect.
Let people know this is the canonical version
In HTML, there is a tag you can set that says, “whatever else you think, this is the canonical version of this content”. If you have a personal blog and a Medium blog you cross-post to, you should make sure you can tell search engines which is the canonical version. If you don’t, you run into issues where search engines see two pages as duplicate content. Search engines will do their best but could end up penalising your legitimate content, thinking it is a copy.
Even within one application, you can run into this issue. Even if you perform all the above steps to ensure only one version of your website is available to the outside world, you will often have two pages with almost identical content.
We can solve this by using a “Canonical Tag”; this tag resides in the <head> of your HTML document that points to the canonical version of the page.
It looks like this;
<link rel="canonical" href="https://tosbourn.com/ruby-on-rails-seo" />
Unfortunately, this isn’t as simple as writing something like;
# don't do this
<link rel="canonical" href="<%= link_to my_url %>">
There are lots of edge cases to consider for my_url. We suggest using Canonical Rails.
Setting up Canonical Rails
In your Gemfile add;
gem 'canonical-rails' # Canonical Tag management
After running bundle install to install this new gem, you can run rails g canonical_rails:install this runs an install script that creates a file config/initializers/canonical_rails.rb
There are some configurations you need to set;
config.protocol = 'https://'
config.host = 'www.yourwebsite.com'
config.collection_actions = []
config.allowed_parameters = %i[page]
config.opengraph_url = false
Here is an explanation of each setting;
config.protocol = 'https://'- We use https for all our pages, so all canonical URLs should use https.config.host = 'www.yourwebsite.com'- The main domain name you use, if you have a .com and a .org, pick one to be the “main” domain name.config.collection_actions = []- We don’t want any trailing slashes. If you want trailing slashes, you can add actions here, e.g.:showconfig.allowed_parameters = %i[page]- We often allowpageas a parameter because we use pagination and want each page considered separate. Other parameters will be ignored.config.opengraph_url = false- We already set this in the application view, but if you want this gem to generate an OpenGraph URL for you, set this to true
Redirect old URLs
Over the lifetime of your application, URL structures will come and go. /people might become /users, or commonly /posts might start being called /articles.
Even if you’ve taken the time to fix all internal links to point to the new URL, you have no control over what links people have shared or have bookmarked over time. Because of this, it is vital to redirect old URLs to new ones correctly.
It isn’t uncommon for a small change like site.com/blog/my-post/ to drop in search rankings after the URL has changed to site.com/articles/my-post/ - because overnight all the links that used to point to it are lost.
We can fix this in our config/routes.rb file.
get '/my-really-specific-old-url', to: redirect('/my-new-url', status: 301)
This will tell Rails to redirect the old URL to the new one, with a status of 301, which tells search engines the redirect is permanent, so please forget about the old URL in favour of the new one.
Redirecting collections of data is very similar;
get '/blogs/:name', to: redirect('/articles/%{name}', status: 301)
This will redirect anything after /blogs/ and pass it into /articles/.
Prefer slugs to ids in URLs
By default, Rails uses IDs in its URLs. A typical pattern would be to see a URL /articles/1, which we would expect to trigger ArticlesController#show, and in it, we would see;
class ArticlesController < ApplicationController
 def show
   @article = Article.find!(params[:id])
 end
end
There are a few issues with this approach; from a security point of view, you leave the URL guessable because you could change 1 for 2 and see what article is there. You can plug this security hole a few different ways, but from an SEO perspective, the URL is important, and 1 doesn’t mean anything.
Without clicking on the link, you can guess what https://tosbourn.com/ruby-on-rails-seo/ is going to talk about more than you could https://tosbourn.com/1234.
We recommend that any model that has an externally viewable URL should have a slug parameter.
Many people use gems to do this, but we’ve found it can be handled with relatively little application code and allows you to customise the slug for each model if you want.
Example of a model that sets a slug;
class Article < ApplicationRecord
  validates :slug, presence: true, uniqueness: true

  before_validation :generate_slug

  def generate_slug
    return if slug.present?

    self.slug = title.try(:parameterize)
    self.slug = "#{slug}-#{user.username}" if Article.find_by(slug: slug).present?
  end

  def to_param
    slug
  end
end
The content of generate_slug will depend on your system, but in this code, we are saying, create a slug before validating anything.
If there is already a slug set (we are editing the record, perhaps), then return early.
First of all, take the title if it is set and call parameterize, which would turn “This Title” into “this-title”.
Next, we try and see if there is an article with that slug already; if there is, append the author’s username to the slug and save it.
Other systems will append the ID at the end to try and keep it unique or add a genuinely unique hash as part of the slug. Where possible, you want to keep the slug as human readable as possible. In this case, because it is an article, the author’s username is more relevant than an ID.
If you were creating an Events model, you might append the location or event date as extra information to make it unique.
In your controller, you would need to set the following;
class ArticlesController < ApplicationController
 def show
   @article = Article.find_by!(slug: params[:id])
 end
end
In our model, we set a to_param method. This is to override the default to_param given to us by ActiveRecord. By default, to_param returns the ID of the model. We want it to return the slug, so when we call something like articles_path(@article), it knows to generate articles/my-article and not articles/1.
Add structured data
Always strive to use semantic markup on your pages. It makes them more accessible and more easily understood by computers. This means using the elements as intended and relying on CSS to style them. For example, if you have a link you want to look like a button, use <a> and style it, don’t use <button>. Likewise, if you want a heading but want it to look relatively small, use the appropriate <h#> for your document, such as <h2> and again use CSS to style the size.
Unfortunately, this will only get you so far, search engines will try and “get” your web page based on the content and the markup, but subtle context is challenging for a machine to understand. Luckily, we can give them massive clues using structured data.
Most search engines have settled on using Schema.org as their structured data tool of choice. There are a lot of excellent types and properties supported by Schema.org (want to mark up a blood test?).
Once you have found the type that most appropriately maps your data, you should ensure this appears on the page.
The easiest way to do this in Rails is to have your models generate the schema for you.
Depending on how you like to code, this could easily live in a Presenter class, so long as the view can call it;
<script type="application/ld+json">
  <%= @event.to_schema.to_json.html_safe %>
</script>
This will call @event.to_schema and turn our returned hash into JSON; then, it will mark that this is safe to show as HTML to avoid escaping characters.
The to_schema method will look different for each model, but an example event could look like this;
  def to_schema
    schema = {
      '@context': 'https://schema.org',
      '@type': 'Event',
      name: name,
      about: description,
      description: description,
      identifier: id,
      contributor: user.username,
      doorTime: start_date,
      endDate: end_date,
      startDate: start_date,
      performer: { '@type': 'Organization',
                   name: name },
      organizer: { '@type': 'Organization',
                   name: name,
                   url: Rails.application.routes.url_helpers.url_for(controller: 'events', action: 'show', id: slug, locale: nil) },
    }
    schema[:image] = image.attached? ? Rails.application.routes.url_helpers.url_for(image) : ActionController::Base.helpers.asset_url('social.webp')
    schema[:location] = if address?
                          { '@type': 'Place',
                            name: street_address,
                            address: {
                              '@type': 'PostalAddress',
                              addressLocality: city,
                              addressRegion: region,
                              postalCode: postcode,
                              streetAddress: street_address
                            } }
                        else
                          { '@type': 'VirtualLocation',
                            url: Rails.application.routes.url_helpers.url_for(controller: 'events', action: 'show', id: slug, locale: nil) }
                        end
    schema
  end
The majority of this code is looking up the attributes in our model and putting them into a format Schema.org wants. You can see how this could quickly become messy to have in your model.
Some gems can do some of the legwork for you, but in our experience, they don’t allow you the flexibility to handle some of the edge cases you will come across.
Improve Time To First Byte
One of the metrics used to judge the overall speed of a webpage is Time To First Byte (TTFB). This is the time it takes between a browser requesting your webpage and your server sending back the first bit of data.
You want the TTFB to be as small as possible, not just for user experience and SEO purposes. TTFB is a good proxy for just how much work your server is doing. If requests take 500ms to send back and you can fix stuff to make it 250ms, then you’ve effectively reduced your server requirements by half. Allowing you to serve more traffic with the same hardware, reducing costs and delaying scaling conversations.
We can highly recommend The Complete Guide to Rails Performance by Nate Berkopec which goes into depth around getting a tonne of performance out of your Rails applications.
Two things we think are worth mentioning, in particular, that can drastically increase how much work your server is doing are:
- Reducing database queries
- Caching view code
Reduce database queries
ActiveRecord is amazing. Anyone who had to make websites that relied on raw SQL queries will know it is a revelation.
This level of abstraction comes at a cost, however. Sometimes it isn’t entirely clear that you’re even calling the database when you make a call.
@user = User.first
@user.comments.each do |comment|
 comment.text
end
This code, for example, will run a database query to grab the first user, then for each comment, it will run another query to grab the comment record.
We call this an N+1 query because, for every number of comments, you need 1 query each, plus the original first query.
In Rails, we can fix this kind of issue by telling Rails to include comments when it grabs a user.
@user = User.includes(:comments).first
There are a couple of gems that can help detect and report on N+1 queries. Our go-to is Bullet.
Installing Bullet
Installing Bullet to run in development mode requires adding a gem and setting a small amount of configuration.
In your Gemfile anywhere after where you include the rails gem add;
group :development do
  gem 'bullet' # Used to catch N+1 queries
end
This will install Bullet in development mode only, you can have it run during your tests, but we’ve found a few edge cases that introduce more headaches than the benefit you receive. You don’t want Bullet running in production mode since there is an overhead to reviewing all your queries.
Next, you run the installer, which will create the necessary configuration file;
bundle exec rails g bullet:install
This will set the necessary configuration information. You can update this configuration in config/environments/development.rb
Bullet has a lot of direct ties to reporting tools like Rollbar and Airbrake, but what we tend to use on projects is;
config.after_initialize do
  Bullet.enable = true
  Bullet.bullet_logger = true
  Bullet.rails_logger = true
  Bullet.add_footer = true
end
This will;
- enable Bullet
- log everything to /logs/bullet.log
- also log to /logs/development.log
- put a footer on every page with issues for easy debugging
Cache view code
Another common approach to reducing TTFB is to cache view files. This means Rails doesn’t need to calculate the data related to cached information, again and again, saving time.
The Rails guide on caching will tell you everything you need to know.
In general, you will need to;
- set up a cache store
- decide what should be cached
Setting up a cache store
In a production environment, you don’t want to use your memory for caching things. You can quickly run out of space and burn through memory limits. The two most common cache stores are Redis and Memcached.
To use a Redis cache store inside config/environments/production.rb, you can set;
config.cache_store = :redis_cache_store, { url: ENV['REDIS_URL'] }
Where ENV['REDIS_URL'] is an environment variable for a URL like “redis://username:password@servername.com:port”
Ensure and set an appropriate eviction policy, which tells Redis what it should do when it runs out of space. We tend to use “allkeys-lru”, which removes less recently used keys first.
Decide what should be cached
You can cache anything in a view by calling cache, which accepts a block, which is everything to cache;
<% cache @articles do %>
  <% @articles.each do |article| %>
   <h2><%= article.title %></h2>
   <!-- etc -->
  <% end %>
<% end %>
Each time the first line is accessed, Rails will check if we have the results of cache @articles anywhere, and if so, we will return it.
By default, this cache will invalidate if @articles changes. If you are caching something with nested properties, for example, if an article has comments, make sure that updating a comment touches the article.
class Article < ApplicationRecord
  has_many :comments
end

class Comment < ApplicationRecord
  belongs_to :article, touch: true
end
If you need to be able to expire the cache for other reasons, for example, if you show different things based on the user, you can pass an array to cache;
<% cache [@articles, current_user] do %>
  <% @articles.each do |article| %>
   <h2><%= article.title %></h2>
   <!-- etc -->
  <% end %>
<% end %>
This code would cache the same @articles for each user of the site (plus a version for when current_user is nil).
Use appropriate image variants
ActiveStorage gives us a convenient way to upload and serve images on Rails applications. However, the image uploaded is rarely the image we want to serve people. Making sure images are appropriately sized and formatted can speed up the site for your end-users.
If you had the following setup, you could quickly see images;
class User < ActiveRecord
  has_one_attached :avatar
end

# In a view file

<%= image_tag @user.avatar %>
You might notice some weirdly shaped avatars and using CSS or HTML fix the width and height;
<%= image_tag @user.avatar, height: 50, width: 50 %>
This would generate am image 50px tall and 50px wide. Visually this will look fine, but if the user had uploaded an avatar 100px x 100px, we’re asking the user to download an image twice the size they need.
This is where variants come in.
<%= image_tag @user.avatar.variant(resize: '50x50'), height: 50, width: 50 %>
This will generate an image of the size you need.
In our opinion, ActiveStorage is one of the least battle-tested parts of Rails. In our production applications, we go a little further to improve the performance of ActiveStorage, but it requires some monkey patching and playing about. There are some open PRs in the Rails project that should make things easier once merged, and we will update this post to reflect that.
Sitemaps
A sitemap is one or more XML files that tell search engines where all your pages are and how often they are updated. Here is a basic example of what it might look like;
<?xml version="1.0" encoding="UTF-8"?>
<urlset xmlns="http://www.sitemaps.org/schemas/sitemap/0.9">
   <url>
      <loc>https://tosbourn.com/ruby-on-rails-seo/</loc>
      <lastmod>2021-04-20</lastmod>
      <changefreq>monthly</changefreq>
      <priority>0.8</priority>
   </url>
</urlset>
This says that the page on https://tosbourn.com/ruby-on-rails-seo/ was last updated on the 20th April 2020; it is generally updated monthly and has a relative priority of 0.8.
If the search engine hasn’t looked at that page since it was last modified, it will prioritise checking it out.
By telling it the change frequency, the search engine can guess when it should try and search the page again. Some of your pages will update very infrequently, and others all the time, you want search engines to keep looking at the frequently updated pages.
Finally, the priority is relative to other pages on your site. If you have 1000 pages that you want on search engines but don’t care that much about, make sure they are a lower priority than the 100 you care about. Search engines will make sure to check out these pages a little more often.
In Rails, the best gem for generating a sitemap is the sitemap_generator.
Setting up Sitemap Generator
In your Gemfile add;
gem 'sitemap_generator' # Generates our sitemap
And install it with bundle install.
Running rails sitemap:install will create a sample config/sitemap.rb file, which you can edit.
Here is an example from one of our production websites;
require 'fog-aws'

SitemapGenerator::Sitemap.default_host = 'https://www.mysite.com'
SitemapGenerator::Sitemap.sitemaps_host = "https://#{ENV['AWS_REGION']}.amazonaws.com/#{ENV['FOG_DIRECTORY']}/"
SitemapGenerator::Sitemap.public_path = 'tmp/'
SitemapGenerator::Sitemap.sitemaps_path = 'sitemaps/'

settings = { fog_provider: 'AWS',
             aws_access_key_id: ENV['AWS_ACCESS_KEY'],
             aws_secret_access_key: ENV['AWS_SECRET_KEY'],
             fog_directory: ENV['FOG_DIRECTORY'],
             fog_region: ENV['AWS_REGION'] }

SitemapGenerator::Sitemap.adapter = SitemapGenerator::S3Adapter.new(settings)

SitemapGenerator::Sitemap.create do
  add articles_path, changefreq: 'daily', priority: 0.8
  Articles.approved.find_each do |article|
    add article_path(article), lastmod: article.updated_at, changefreq: 'monthly', priority: 0.9
  end
end
We host Rails applications on Heroku, which doesn’t have a permanent file store for storing things like sitemaps. So we tell the sitemap generator gem to use an s3 bucket on AWS.
The important part is everything inside SitemapGenerator::Sitemap.create. In our example, we are adding articles_path, and all approved Articles. We’ve set a change frequency and a priority for both, and for the individual articles, we’ve set when they were last modified.
Sitemap generator comes with a rake task for regenerating the sitemap and letting search engines know about it; rake sitemap:refresh.
You should set a cron job on your production server to run this rake task regularly; we usually run it once a day. On Heroku, we use Heroku Scheduler, a free add-on to manage running the rake task daily.
Robots.txt
Robots.txt is a file that all spiders and scrapers should read and honour.
A robots.txt file tells search engine crawlers which pages or files the crawler can or can't request from your site. This is used mainly to avoid overloading your site with requests Google Developer Guide
You can completely block specific user agents, you can define a crawl delay (if you’re concerned your pages are getting hit too frequently), and you can tell crawlers where to look for sitemaps.
Ruby on Rails applications tend to generate a mix of public and private pages. If a crawler is never going to get inside the content of some of these pages, disallowing it will save it valuable time that could be spent crawling the public pages you want to appear.
User-agent: *
Allow: /
Disallow: /newsletter-thanks/
Disallow: /offline/

User-agent: SemrushBot
Disallow: /

Sitemap: https://mysite.s3.amazonaws.com/sitemaps/sitemap.xml.gz
In this example, we’re allowing all user-agents to access everything except /newsletter-thanks/ and /offline/, which we don’t allow anyone to access.
We also don’t allow the SemrushBot crawler access to anything.
By setting the Sitemap property, we’re telling any crawler, “hey, if you want more pages, here is where you can find them”.
We’ve seen some Rails articles that describe how you can set up a route to manage your Robots.txt programmatically. If you have a particularly complicated setup, that might be a good idea; however, the vast majority of applications maintaining your public/robots.txt as a text file should be ample.
For more information on robots.txt, our favourite guide is written by Moz.
Rel=nofollow
The rel attribute defines the relationship between a page you link to and the page you are on. You can set plenty of values that have a knock-on effect for SEO, for example, setting rel="next" when dealing with pagination. But the one I want to cover is rel= "nofollow".
Indicates that the current document's original author or publisher does not endorse the referenced document. Mozilla Developer Network
One of the major ranking factors for search engines is how many links a page has going to it. Which makes sense because if lots of authoritative places are linking to a page, then the assumption has to be that it is a good quality page.
When a search engine sees “nofollow”, it will either do what it is told and not follow the link, or it will but won’t pass any value with it. We need to consider both in our Rails application.
Don’t waste crawl budget on hidden pages
If you link to a page that requires a user to log in, then there is no point in asking a search engine to spend any time visiting that link. They will presumably be redirected to a login page. You almost certainly don’t care if your login page is listed in search engines.
You set a rel attribute on a link_to the same way you would add a class. For example;
<%= link_to 'Secret Page', users_only_path, rel: 'nofollow' >
Generates a link like;
<a href="/users_only" rel='nofollow'>Secret Page</a>
We’ve seen some projects create helper methods for this, but generally, this only adds an extra layer of confusion to developers coming onto the project.
Consider user-generated links
One of the reasons comment spam exists is that it is a potentially quick way to get a link from another website.
Just like how you should be wary of user-generated content from a security point of view, you should also make sure that any links are to places you are happy to link to. Google has its own rel="ugc" that stands for “user-generated content”, but marking content as rel="nofollow" will do the same.
With user-generated content, you often can’t use link_to, so we need to get a bit more creative.
If we have a comment model that has a content attribute, we could do a before_save like this;
class Comment < ApplicationRecord
  before_save :add_no_follow

  def add_no_follow
    doc = Nokogiri::HTML::DocumentFragment.parse(self.content)
    doc.css('a').each { |a| a[:rel] = 'nofollow' }
    self.content = doc.to_s
  end
end
This code will trigger just before a Comment is saved to the database. It uses Nokogiri, an HTML parser, to look through any HTML that has an a element and makes sure the rel attribute is set to “nofollow”
Conclusion
We could write about this topic so much more, and as we said in the beginning, we will be updating this article over time. Hopefully, you have found this useful. If you have any questions or think you would appreciate having us look at your Rails project, we’d be happy to chat more.